Thursday, December 15, 2011
The Aquaponics Gardener Greenhouse update for December
Just thought I would throw together a quick update on the progress of the greenhouse. It's been a month since the last video showing how all of the plants and fish are growing....I'm very excited to see that the system is really starting to crank out the produce, and in the middle of winter...just mind numbing. Anyway, here's a quick look.
And as stated in the video we had our first harvest of produce, I picked and prepared Swiss Chard, all types of Kale, Basil, Arugula Chocolate mint, and spearmint which was mixed up in a nice salad. It was really good, and there is plenty left over for a few days. I still have quiet a bit more growing in the greenhouse.
Friday, December 9, 2011
DIY EZ Cloner for Under $50 bucks
OK...so I realized that raising tomato plants from seed at this point is going to be challenging and I don't really have a resource in the winter for tomato plants, so what's an Aquaponics Gardener to do...Why, build my own DIY EZ Cloner and all for under $50..I say around $40 in the video, but I didn't figure in the cost of the pipe, fittings and the three additional Net Pots w/Neoprene inserts I'm going to need, so the total comes in at a little under $50..still not bad considering the price of a commercial unit. Here a few pics of the unit and a video overview of the cloner...I think it is going to work out just fine.


The Finish Product

A Blue 20 Gallon Tote from my local Family Dollar for $10

Fairly deep compared to an 18 Gallon Tote

Layout for 2" holes to accommodate Net Pots

Starting the holes

Standard 2" Net Pots with Neoprene inserts.

Finished the holes for now, still have to purchase 3 more 2" Net Pots w/Inserts

1/2" PVC pipe spray bar before being drilled for spray heads

Spray bar with 360 Degree spray heads installed.

Close up of 360 mist head 11/64 drill bit used for installation

Close up of 360 degree downspray streaming head 11/64 drill bit used for installation

600 GPH pump to be changed out for a 300+ GPH later on.

Assembly installed in Tote
Here is a short video overview of the EZ Cloner in action.
Enjoy!!!
Thursday, December 8, 2011
System Expansion Plans
OK...So, I've been toying with the idea of expanding my Aquaponics system to include DWC raft beds. I threw together a little sketch in Google Sketchup to show what it may evolve into later next year. I already have some of the peices needed such as the AquaTop AB120 Blower, Expanded Shale, etc. After careful calculation I can probably throw about $1.5K at it, which would include a Hoop Style Greenhouse covered in 6mil Poly Greenhouse plastic...not bad for the extra I would gain in grow space. I can use the existing system along with the two Danner MagDrive 9.5 -950 GPH pumps that currently sit in the fish tanks along with the Expanded Shale growbeds and the dual 1000W Titanium Aquarium heaters. I can redisign this system into a Constant Height in Fish Tank with no Sump needed. Using an Undercurrent model the Raft beds would be the sump with the pumps sitting outside of the tanks/growbeds while pulling the water through the DWC raft beds and pumping water backup into the Expanded Shale growbeds. From my calculations even if all of the Shale growbeds filled at the same time/rate, then the rafts water levels would only drop 1.5 inches or 3/4 inch if I installed an indexing valve. The combo Vortex / Swirl filter and degassing chambers along with the shale growbeds should take care of all the filtering for the system. On the Mag pump with a 3' head, I should get about 800GPH out of both pumps , that would circulate all of the water in 4 raft beds in approx. 1hr 19m. The Shale growbeds would flood and drain approx. 3 times per hour. Taking all growbeds into consideration, initially I will have 345Sq ft of growbed space. Using the assumption that you need .3LBs of fish per square foot of growbed space, I would calculate that 103 +/- 1Lb fish are needed for the system, approximately 25 fish per 175 Gal Tank. I have the capacity to add another 2 Raft growbeds and up my count to 150 fish total. Here is a quick fly by of the system.
DWC Raft beds are fed by 2" PVC through to the water pumps. Media grow beds use standard 1" PVC drain pipe and 1/2" PVC fill pipe with ball valves for flow control. AquaTop Blower uses 1" and 3/4" PVC pipe with flexible tubing feeding 6" air stones every 3ft in the Raft beds and 12" air stones in each Fish Tank. I have calculated a need for approx. 6CFM total for the system @ 10" H20, and 2CFM @ 24" H20, which the AquaTop AB120 should provide.
Saturday, November 12, 2011
The Aquaponics Gardener
Well, I have decided to change the name of the blog to better correlate what I am doing with my backyard and greenhouse in relation to aquaponics and not just aeroponics. So, the new blog name will be "The Aquaponics Gardener" located at http://aquaponicsgardener.blogspot.com/ , I have also started a YouTube Channel by the same name located here: http://www.youtube.com/user/Aquaponicsgardener . So I will be periodically posting videos of my Aquaponics adventures for your viewing pleasure. Hopefully, this will help some of you who are thinking about taking the plunge with Aquaponics, by avoiding some of the same mistakes I encountered. To get you started here is a quick overview of the Aquaponics system running in my greenhouse after it has been running for approximately 2 months. Enjoy....and until next time.
The Aquaponics Gardener Greenhouse overview video.
Wednesday, November 9, 2011
Worm & Black Soldier Fly larvae beds
I picked up two 32 gal black totes from Lowe's the other day and I am temporarily using one for a worm bed and the other for a BSF larvae bed. I drilled a few 1/2" holes in the top and sides for air circulation on both totes. I stocked one with 2000 red wiggler worms and the other was self populated by Black Soldier Flys after composting our left over table and veggie scraps. I still have to design something, so the BSF larvae will self harvest, more to follow on that as I come up with a game plan.


I am in the process of building a larger, more structurally sound worm bed out of donated wooden pallets. More details and photos to follow.
Lessons learned about nutrients and pest control
Well, it's been a few weeks since my last post. I'm sorry to say that I did not do my due diligence in researching the addition of nutrients to the growbeds in conjunction with the use of organic home made pest control measures. Due to some iron deficiencies in several of my plants, I decided to order some chelated iron to add to the fish tanks and to spray on the plants. I also, experienced some issues with red spider mites on a few of my plants, some on my Cilantro, and Stevia. After mixing up a home made remedy of garlic pepper tea, I decided to attack the red spider mites with a spray bottle of my home made concoction. This appeared to work, so I decided to spray all of my plants...no big deal or so I thought until I sprayed them afterwards with the iron chelate, which was a little to strong. As you can imagine the garlic pepper tea opened the pores in the plants leaves/stems and the iron chelate, being a little too strong, did the rest. By the next morning I had tons of black leaves on most of my plants and within a few days many had died and / or the leaves were severely burned. I am glad to say those plants left have recovered fully, and are growing once again. I even have a few new tomatoes on my plants. I also had to pick a few cutter type worms from some of my swiss chard, so I have ordered some organic BT and Neem oil spray to treat the pest in the future.This will also help with any fungal problems I might encounter in the future. Lesson learned, follow the instructions to the letter on the label, or from the source of the information. A setback...yes, but not the end of the world.
Here are a few pics of the disaster.


Here are a few pics of the disaster.


Tuesday, October 18, 2011
Insulation added to the Greenhouse
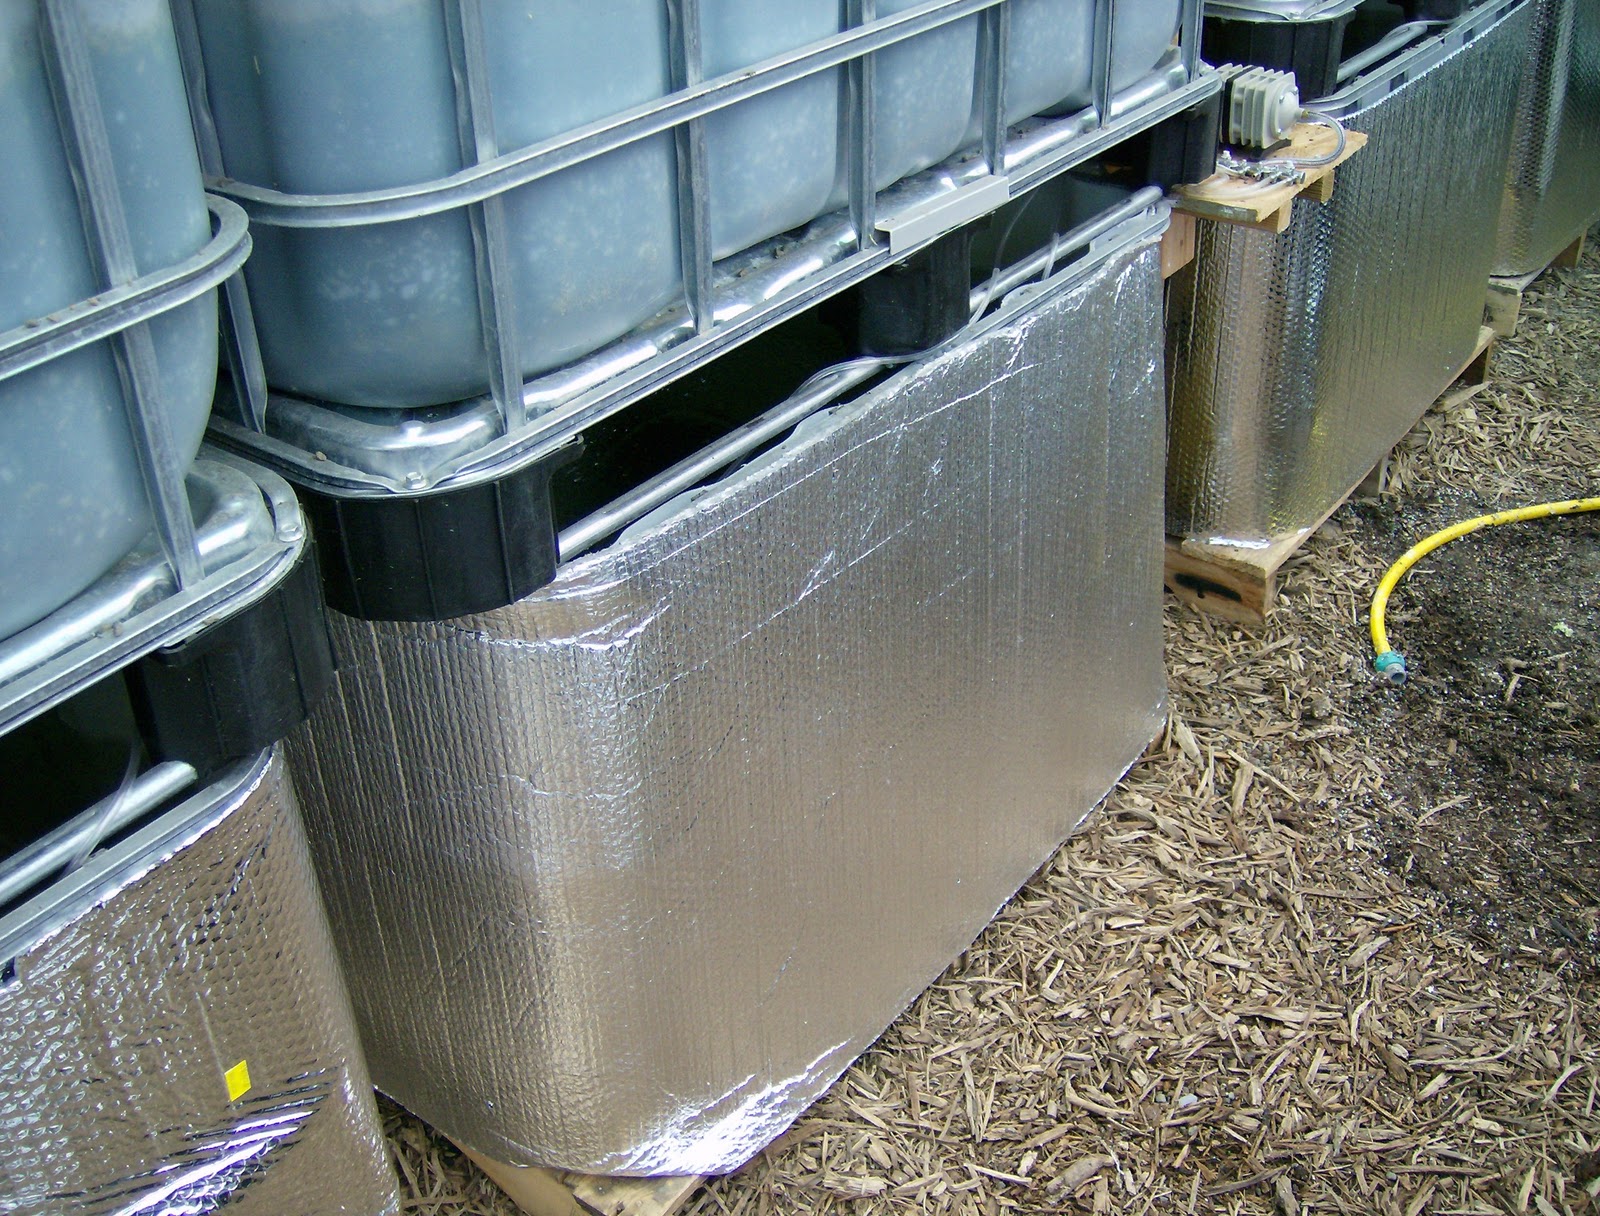
With the upcoming weather changes for fall/winter approaching, I decided to bite the bullet and put up some radiant type / bubble insulation with an R3.7 value. I placed all of this on Saturday last weekend and stapled it in place using a an Arrow T-50 stapler. I used approx. 8 - 2' x 25' rolls, and a single roll of 4'x25' for the IBC Fish Tanks. This material was placed along the end and side walls, and also along the roof trusses. This also provides extra reflective light back onto the plants for added growth.


We had a cold snap this morning which dropped the temp down to 52 degrees outside. With the insulation in place and the greenhouse closed up the temp stayed a balmy 74 degrees.
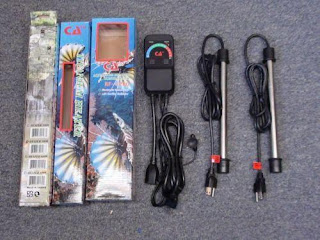
 Not bad for this amount of insulation, of course winter has not set in yet, so for added protection I have purchased a small ceramic based heater which I will use to supplement the natural radiant heat of the greenhouse. I also have purchased a digital dual 500 watt Titanium aquarium heater unit which will be placed in the Fish Tanks to regulate the heat during the winter.

Next up, the building of an Aeroponics cloner/seedling starter system.


We had a cold snap this morning which dropped the temp down to 52 degrees outside. With the insulation in place and the greenhouse closed up the temp stayed a balmy 74 degrees.


Next up, the building of an Aeroponics cloner/seedling starter system.
Water Quality Test for each system
I received my API Freshwater Test Kit a couple of weeks ago, and was able to test the nitrogen cycle of both tanks in relation to each units biological activity.
After running both Aquaponic tank systems for approx. 2 weeks without media in the growbeds, and another week with media, while having approx. 10 gold fish present in each tank for the entire duration I was able to see where my tanks ammonia, PH, Nitrite, & Nitrate levels were at in the cycle.
On October 8th, I had the following results tested at 80 degree water temperature.
Tank System 1:
PH: 8.8 PPM
NO2: 5.0 PPM
NO3: 10 PPM
NH3/4: .25 PPM
Tank System 2:
PH: 8.8 PPM
NO2: 5.0 PPM
NO3: 10-20 PPM
NH3/4: 0 PPM
Another test was performed on October 15 with the following resutls tested at 76 degrees for water temperature.
Tank System 1:
PH: 8.4 PPM
NO2: 0 PPM
NO3: 20 PPM
NH3/4: 0 PPM
Tank System 2
PH: 8.4 PPM
NO2: 2.0 PPM
NO3: 20 PPM
NH3/4: 0 PPM
As can be seen the tank systems are for the most part cycled, with the exception of the PH. which is high and is causing PH block for some of the nutrients in the system such as Iron, Calcium, & Potassium. A good organic pond fertilizer containing 10% iron, and Phosphate only was added to each tank to mitigate the iron deficiency, but due to the PH block this did not help.


I had added over several hours approx. 1/4 Gallon Muriatic acid to each system which temporarily lowered the PH to 7.8, after waiting 24 hours the systems were retested and due to the buffering action of the expanded shale, the PH crept back up to 8.4. I will continue to monitor all water quality on a weekly basis until the systems are stable, Muriatic Acid will continue to be added until I can get the PH down to 7.8, after which I will let it digress on it's own. More plants were added, some of which have shown signs of iron deficiency. I have an organic powdered chelated iron product ordered which should arrive sometime this week. I will add this to the systems and report back on the results.
Overall, plant growth has been outstanding, I have one Stevia plant which has added about 12" of growth in two weeks, and an Early Bird Tomato plant which has added approx. 6-8 inches of growth along with blooms in the same time frame. Kale has doubled in size, and herbs have had significant growth as well. Pepper plants are putting on more fruit as well.


More to follow.
Tuesday, September 27, 2011
GrowBed content has arrived.
Ok, the only thing left to do is fill the growbeds with media, after researching the various options, I narrowed it down to two choices, either Growerstone or Expanded Shale. Due to price, Growerstone in bulk is $3 per cubic ft plus delivery and Expanded Shale is $2.22 per cubic ft plus delivery. I decided on the Expanded Shale, and ordered 3 cubic yards from a local source which was promptly delivered in an hour at a price of $258.00. It takes approximately 23 cubic ft to each growbed and I have four to fill... and so it begins.

 Due to dust from processing the Expanded Shale, It needs to be washed to remove any residue. I accomplished this by taking a 5 gallon plastic bucket and drilling some 2-1/2" holes in the bottom and the placed some left over wiring screening I had laying around, this not only helps with removing dust/sand from the Shale but also helps in grading the size of the material. I should get a pretty consistent 3/8" stone size on the shale.

 I tried using a regular spray hose to clean the shale, but it was not very effective, so I broke out the pressure washer and gave it a spin. I filled the buckets up about 1/2 full with shale and pressure washed it with a fan spray which seems to work fairly well. It does however breakup and create smaller granules which I can't separate out, this will just have to go in the beds, and hopefully it will not cause clogging problems later on.
 It takes about 30 minutes to clean a 6CuFt wheelbarrow full of shale and another 10-15 minutes to unload it into the grow beds.


It takes approx. 4-1/2 wheelbarrow to fill a growbed, so it is somewhat time consuming to do so, but hopefully well worth the effort in the long run, and finally the first growbed is complete. The media is 1" to 2" inches above the water fill line. This prevent algae growth on top of the media in the beds.

After filling the growbeds with media, I still have about half of the Expanded Shale left, obviously I received a lot more than 3 cubic yards, so that will go into the raised beds for water retention and aeration which I am planning on putting in before winter sets in. I planted a few herbs and a couple of tomato plants to see how the plants would do in the growbeds.
 I still need to test the water for ammonia, nitrites, nitrates to
determine the levels and whether the plants are doing there job in using
the nitrates and whether the bacteria have kicked in and are converting
the waste into usable Nitrates for the plants. I guess that means I have to buy a test kit...on my list of things to do.
I still need to test the water for ammonia, nitrites, nitrates to
determine the levels and whether the plants are doing there job in using
the nitrates and whether the bacteria have kicked in and are converting
the waste into usable Nitrates for the plants. I guess that means I have to buy a test kit...on my list of things to do.
And now it's on to the worm beds.....


It takes approx. 4-1/2 wheelbarrow to fill a growbed, so it is somewhat time consuming to do so, but hopefully well worth the effort in the long run, and finally the first growbed is complete. The media is 1" to 2" inches above the water fill line. This prevent algae growth on top of the media in the beds.

After filling the growbeds with media, I still have about half of the Expanded Shale left, obviously I received a lot more than 3 cubic yards, so that will go into the raised beds for water retention and aeration which I am planning on putting in before winter sets in. I planted a few herbs and a couple of tomato plants to see how the plants would do in the growbeds.

And now it's on to the worm beds.....
IBC Tote tanks... continued
Alright, I have placed the last two tote tanks and configured them like the ones in the previous post without any issues. After measuring the standpipes and bell housing, I had to cut them down by 1-1/2" to get the water level down to 10" in the growbeds which would allow for 12" deep grow media. I also added some drain holes to the outside perf pipe and covered them with fiberglass screening to allow for better water penetration into the siphon, without this I would get a premature siphon break half way through the cycle with substrate in place. Next, I ordered two 950 GPH magnetic drive pumps from a seller on eBay at a huge discount. I basically picked both units up for the price of one. These have been installed and a working as planned.

I also ordered a commercial air pump for use in the tanks with a 6 way control valve assembly and four 18" air stones. This unit puts out 45Liters per Hour which is more than enough for the 1100 Gallons of water I have in the fish tanks. It took about 30ft of 1/8" tubing extended to all tanks to get this in place.

 I also built a small shelf to house the unit and valve assembly. I had to bolt the air pump down to the shelf so it didn't vibrate around and fall off.
 I have added 20 feeder gold fish to the tanks (5 for each tank) to start the nitrogen cycle process. I have had a few die off due to stress so I will be adding more as time permits.


Next it's on to the growbed media.....

I also ordered a commercial air pump for use in the tanks with a 6 way control valve assembly and four 18" air stones. This unit puts out 45Liters per Hour which is more than enough for the 1100 Gallons of water I have in the fish tanks. It took about 30ft of 1/8" tubing extended to all tanks to get this in place.


Next it's on to the growbed media.....
Subscribe to:
Posts (Atom)